Ever wondered what happens when you turn a regular plank upside down? The reverse plank may look simple, but it can challenge your core, arms, shoulders, and legs in a powerful way.
I first came across the term “reverse plank” and wondered what made it different from a normal plank.
At first, it looked like a simple pose, but after learning more about it, I realized that this exercise can help build strength, improve body control, and open the front of the body.
It is a useful move for people who want to add variety to their yoga or fitness routine.
In this guide, we’ll explore what the reverse plank is, how to do it with proper form, its main benefits, common mistakes, and helpful tips for beginners.
Whether you are new to this pose or want to improve your technique, this guide will help you practice the reverse plank with more confidence.
What Is a Reverse Plank?
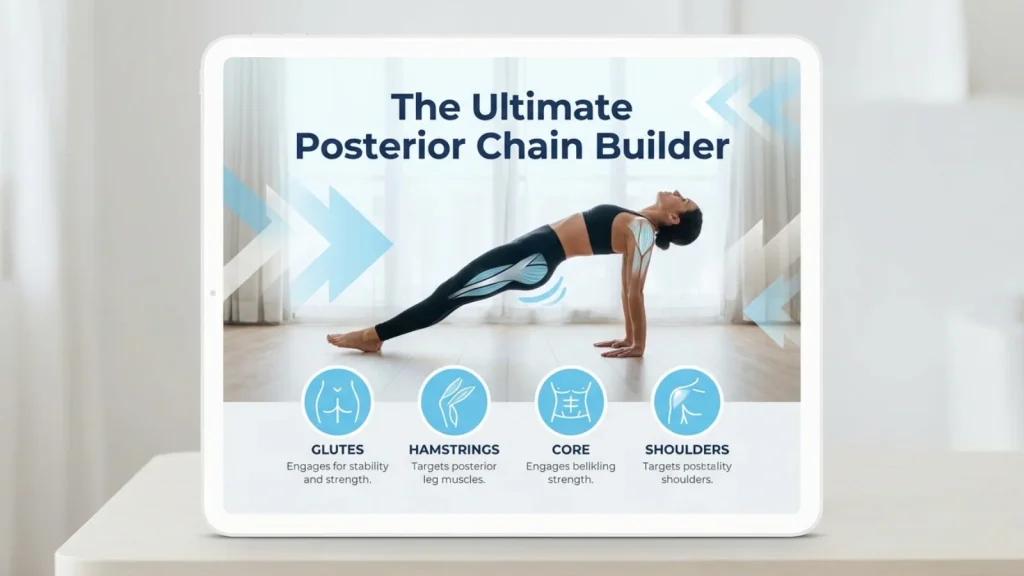
A reverse plank is a bodyweight exercise where you sit on the floor, place your hands behind you, and lift your hips toward the ceiling. Your body forms a long, straight line from your head to your feet.
Unlike a regular plank, your chest faces upward. This position works the back side of your body while also asking your core to stay firm.
The exercise can be done with straight legs for a full reverse plank. Beginners can also bend their knees and keep their feet closer to the body.
Muscles Worked
A reverse plank mainly works:
- Core muscles
- Glutes
- Hamstrings
- Lower back muscles
- Shoulders
- Triceps
- Upper back
- Hip muscles
Because several muscles work together, the exercise can be a useful addition to a full-body strength routine.
How to Do a Reverse Plank Correctly
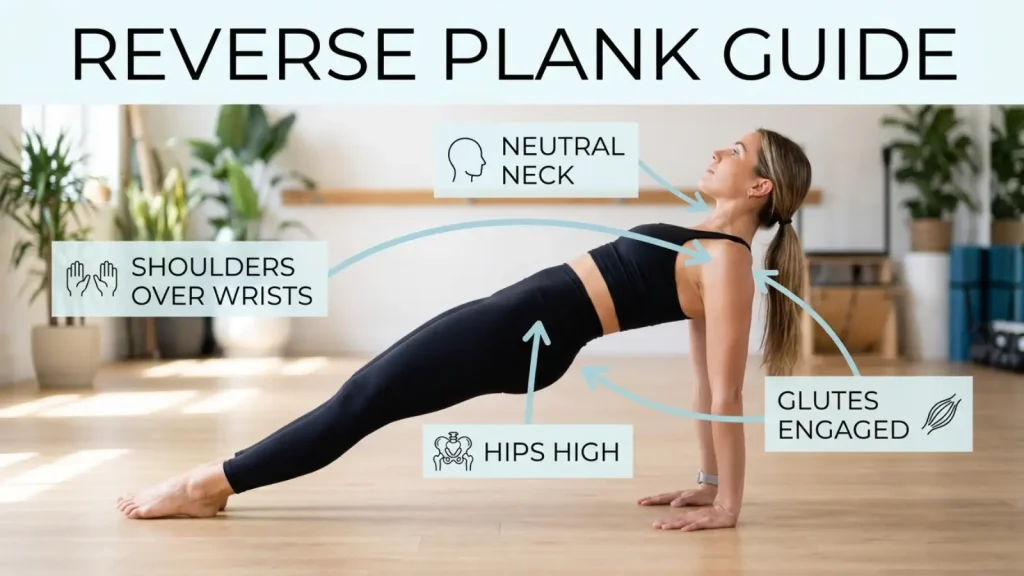
Good form is more important than holding the position for a long time.
Step-by-Step Instructions
- Sit on a mat with your legs straight in front of you.
- Place your hands behind your hips with your fingers pointing toward your feet or slightly outward.
- Press your hands firmly into the floor.
- Straighten your arms without locking your elbows.
- Lift your hips slowly from the floor.
- Tighten your core and glutes.
- Keep your chest open and shoulders away from your ears.
- Try to create a straight line from your shoulders to your heels.
- Keep your neck relaxed and look slightly upward or straight ahead.
- Hold the position while breathing slowly.
- Lower your hips with control.
For beginners, start with about 10–20 seconds. Rest, then repeat for 2–3 sets.
Tip: Do not focus only on how long you can hold the pose. Focus on keeping your body steady and your hips lifted.
What Are the Benefits of the Reverse Plank?
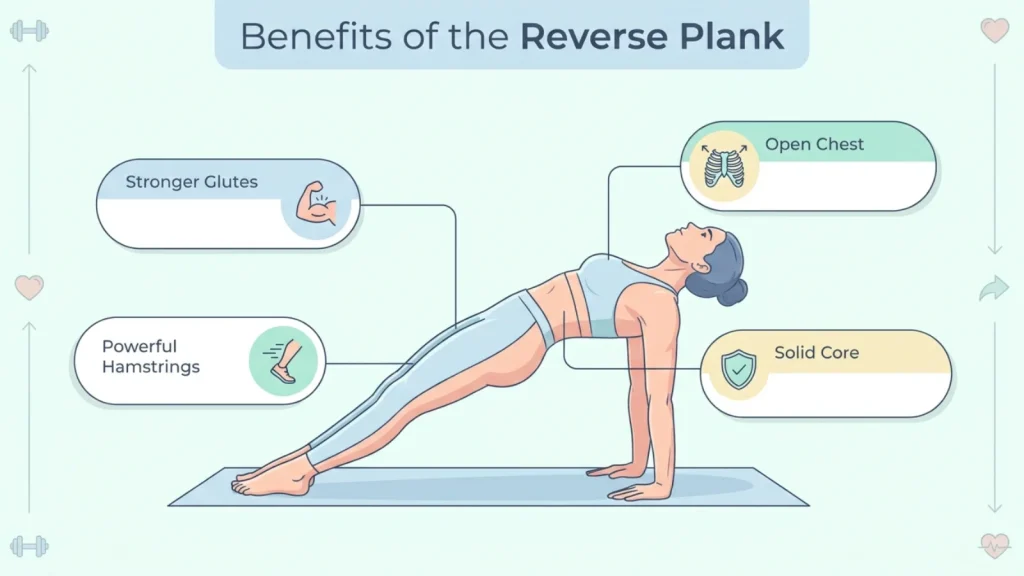
The reverse plank can offer several useful fitness benefits when performed with good form.
1. Strengthens the Core
Your abdominal and deep core muscles help keep your body stable. A strong core can support better control during many daily movements and exercises.
2. Works the Glutes and Hamstrings
Keeping your hips lifted makes your glutes and hamstrings work to maintain the position. This makes the reverse plank useful for training the back of your legs and hips.
3. Builds Upper-Body Strength
Your arms and shoulders support part of your body weight. The triceps also work to help keep your elbows straight and your body lifted.
4. Trains the Posterior Chain
The posterior chain is the group of muscles along the back of your body. It includes the glutes, hamstrings, and back muscles. The reverse plank can help train these muscles together.
5. Improves Body Awareness
Holding the position requires you to control your hips, shoulders, core, and legs at the same time. With practice, this can improve your awareness of body position and movement.
6. Needs No Equipment
You only need enough floor space to lie or sit comfortably. This makes the exercise easy to add to a home workout or yoga-inspired strength routine.
Reverse Plank for Beginners
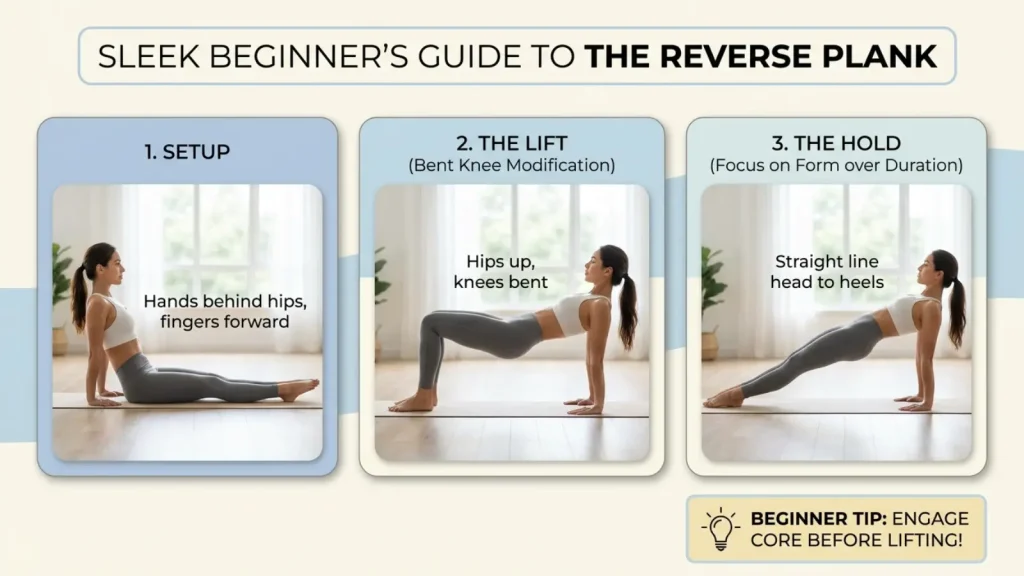
If the full version feels too hard, do not force it. Start with an easier variation.
Bent-Knee Reverse Plank
Sit with your knees bent and feet flat on the floor. Place your hands behind you and lift your hips. Keep your knees bent as you hold the position.
This variation reduces the distance between your hands and feet and can feel easier for beginners.
Short Holds
You do not need to hold the reverse plank for a minute. Try several short holds instead.
A simple beginner routine could be:
- Hold for 10–15 seconds.
- Rest for 20–30 seconds.
- Repeat 2–3 times.
- Increase the hold slowly as your strength improves.
Quality matters more than duration.
Common Reverse Plank Mistakes to Avoid
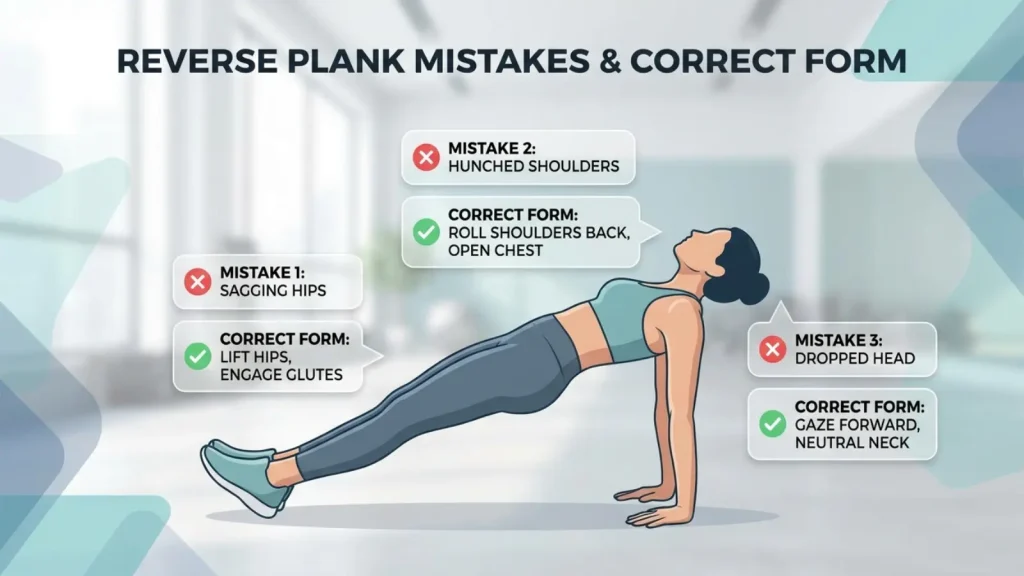
Small form problems can make the exercise less effective or uncomfortable.
Letting the hips drop: Try to keep your hips lifted throughout the hold. If they drop, end the set and rest.
Shrugging the shoulders: Keep your shoulders away from your ears. Press through your hands and keep your chest open.
Bending the elbows: Keep your arms strong and controlled without aggressively locking the elbows.
Pushing the head too far back: Keep your neck relaxed. You do not need to look far behind you.
Holding your breath: Breathe normally throughout the exercise. Slow breathing can help you stay controlled.
Progressing too quickly: Increase your hold time gradually instead of forcing a long hold before your body is ready.
How Long Should You Hold a Reverse Plank?
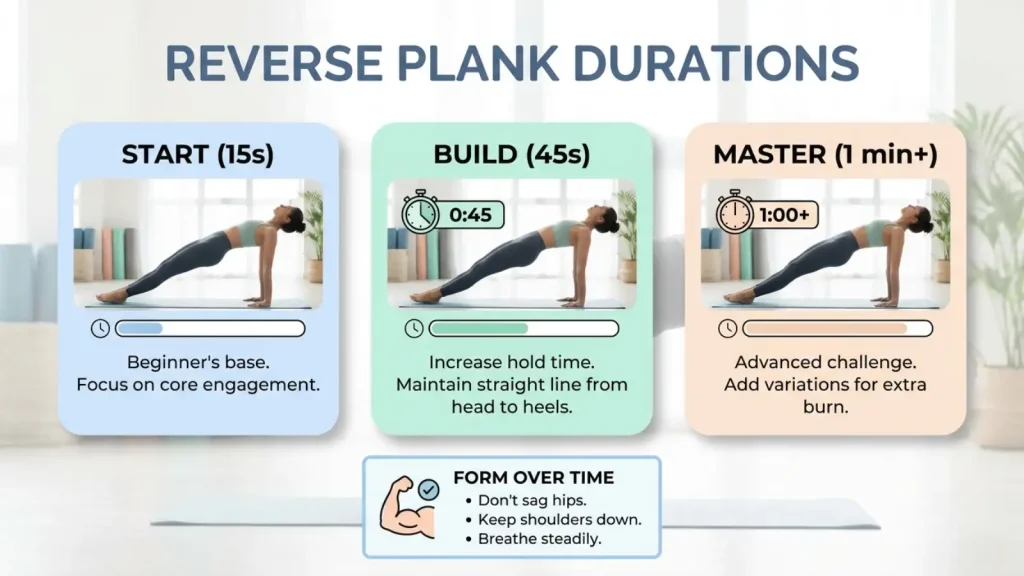
The right hold time depends on your fitness level and form.
Beginners can start with 10–20 seconds. As the exercise becomes easier, you can gradually increase the time to 20–30 seconds or more.
There is no need to chase a very long hold. Once your hips begin to drop or your form becomes poor, it is better to stop, rest, and try again.
You can include the exercise two or three times per week as part of a balanced strength routine, depending on your overall workout plan.
Reverse Plank Safety Tips
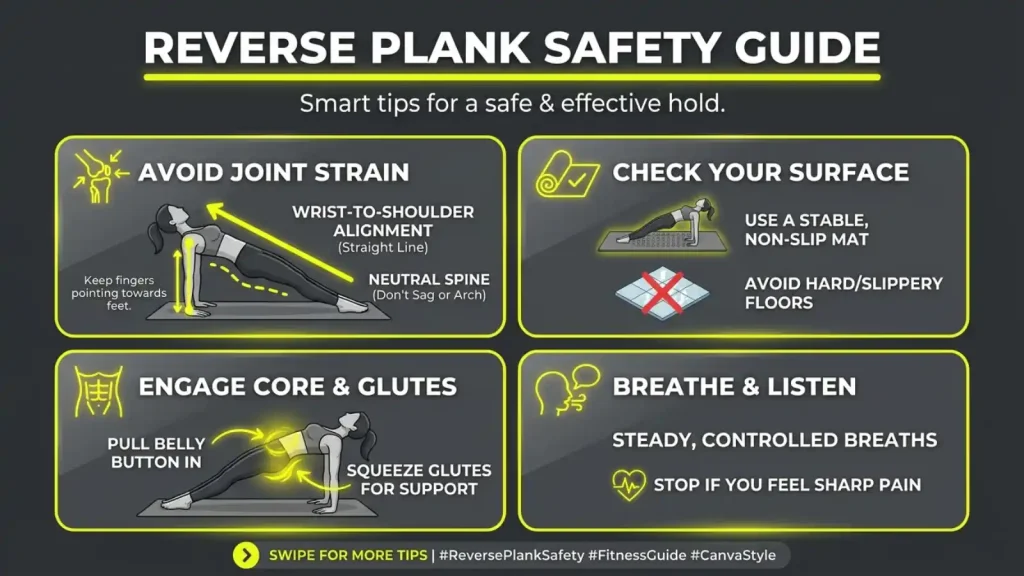
The reverse plank should feel challenging, but it should not cause sharp or unusual pain.
Start slowly and use a stable surface. Keep your wrists, shoulders, hips, and legs controlled throughout the movement. If your wrists feel uncomfortable, try changing your hand position or using a suitable modification.
Stop if you experience sharp pain, dizziness, or unusual discomfort. If you have an injury, medical condition, are pregnant, or have concerns about starting exercise, consider getting guidance from an appropriate health or fitness professional first.
Conclusion
The reverse plank is a simple exercise that can train your core, glutes, hamstrings, shoulders, arms, and back. It needs no equipment and can be adjusted for beginners. Start with short holds, focus on good form, and increase the challenge slowly as you become stronger. The goal is not to hold the position for as long as possible. The goal is to move with control and keep your body aligned. Add the reverse plank to a balanced workout and build your strength one steady hold at a time.
FAQS
1. Is the reverse plank good for beginners?
Yes. Beginners can start with short holds or a bent-knee variation. Focus on proper form rather than trying to hold the position for a long time.
2. What muscles does the reverse plank work?
The reverse plank works the core, glutes, hamstrings, shoulders, triceps, and muscles along the back of the body. Several of these muscles work together to keep your hips lifted.
3. How long should I hold a reverse plank?
Beginners can start with 10–20 seconds for each set. As your strength improves, you can slowly increase the hold time while keeping good form.
4. Can the reverse plank strengthen the core?
Yes. Your core muscles help keep your body stable while your hips remain lifted. Regular practice can make the exercise a useful part of a core-strengthening routine.
5. Why do my wrists hurt during a reverse plank?
Wrist discomfort can come from the hand position, limited tolerance, or poor technique. Try a comfortable hand position, reduce the hold time, and stop if you feel sharp or unusual pain.